


Create and publish a shared space
Set up the details, location and publication for a food court or market.
Create a shared space under a brand, which provides its visual identity. You need permission to create spaces and capacity under your organization's plan.
Create a space from the brand
- Choose the host brand with Switch place.
- Open Shared spaces.
- Select Create shared space.
- Enter a Name and review the Identifier.
- Select Create shared space and open the new space.
You can start with only a name and fill in the rest later. The space remains unpublished while you set it up. You do not need a brand for every hosted location; each location keeps its own brand.
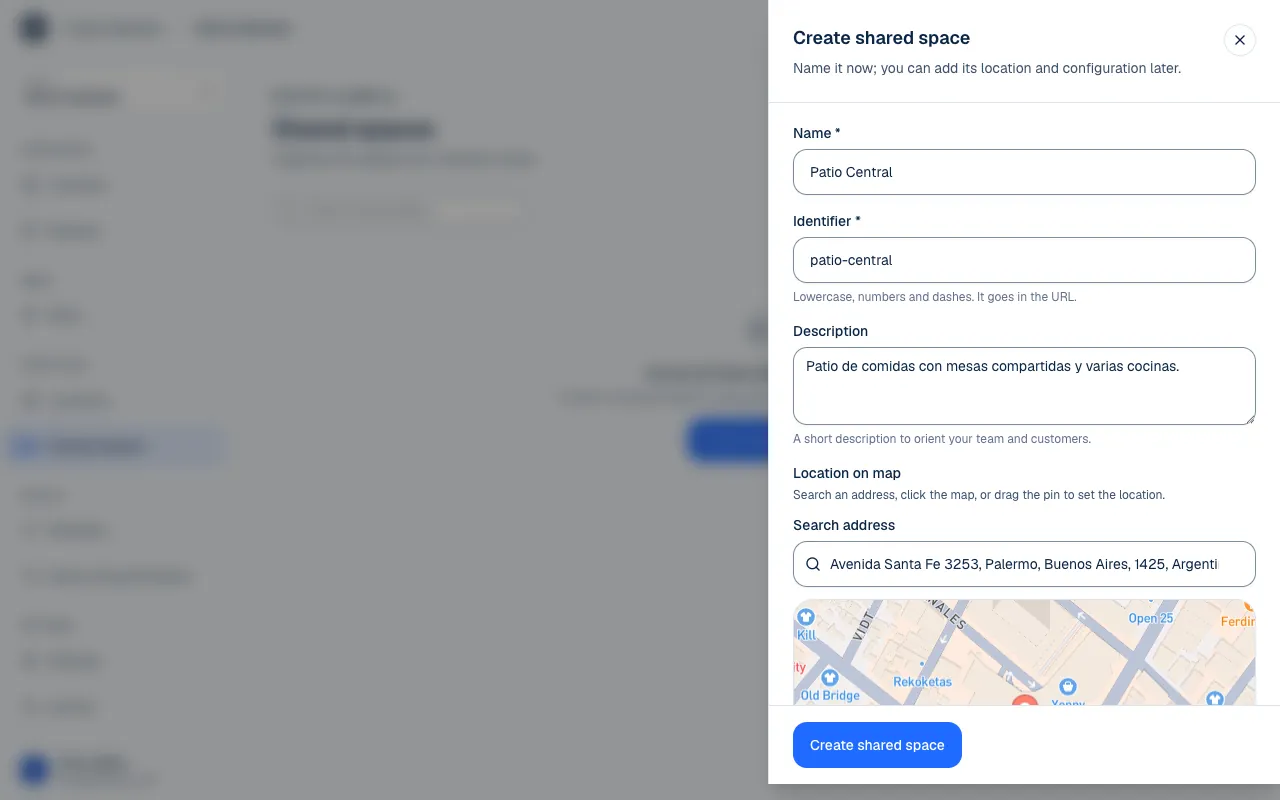
Fill in General settings
In the space, open Settings → General.
| Detail | What to enter |
|---|---|
| Name | The public name of the market or food court. |
| Identifier | The text in its URL, using lowercase letters, numbers and hyphens. |
| Description | A short introduction to guide visitors. |
| Location on map | The building's address and location on the map. |
Search for the address, select a point on the map or drag the pin to place the space. Select Save changes. If you cannot edit, the screen lets you view the details and explains that you do not have permission.
The logo and colors come from the host brand. You can upload a cover for the space under Settings → Appearance. If it does not have its own cover, it uses the brand's cover.
Prepare before publishing
Creating a space does not add locations automatically. Invite them under Hosting (Host locations). Then prepare the Floor plan with shared zones and tables (The space floor plan and QR codes).
Under Menu, create shared sections and coordinate with each location to add its dishes (The food court menu). The food court menu is a shared selection; products still belong to the kitchens that prepare them.
Also set up Settings → Hours, Online orders and Table calls. These choices coordinate how the building operates with the locations inside it (Space settings).
Publish the space
Under Settings → General → Publication, select Publish. The space and its menu become available to customers, and its QR codes start opening them. Select Unpublish to hide them again.
Publishing the space does not publish locations that are still in setup. Each location keeps its own publication status and requirements for receiving orders.
Capacity and archiving
The plan counts shared spaces separately from brands and locations (Choose and review a plan). If you reach the limit, you cannot create another until there is capacity. Existing spaces are not deleted for being over a limit.
An archived space stops operating and its public pages close, but the history remains for people with access. Under Shared spaces, Show archived lets you find it and select Restore. Restoring it checks capacity again, including locations that need to return with it.
If something isn't working
- That identifier is already taken. Another place already uses that address. Choose another identifier.
- You've reached what your plan includes. There is no room for another space, when you create one or restore one. Review the plan.
- The shared space couldn't be created. Try again. Wait a moment and try again.
- This shared space is archived. Everything is visible, but nothing can change until someone selects Restore.
- The tables open the menu but nobody can order: check that each location is published and taking orders, and the conditions in Space settings.
If the problem continues, email support@piqero.app (opens in a new tab). Help and support lists what to include.